Showing posts with label MyMemories. Show all posts

Wednesday, January 16, 2019

Stormy Seas


I love the Pacific coast and spend quite a bit of time there.  Here is another digital layout from my January 2018 trip.


The layout is fairly simple. I used diagonal mats to create continuity. I liked the look of the rusty prongs from the Oceanside pack so I added them to the first photo.  The sandy border was just what I needed for beach photos so I extended it across both pages. For a fun look, I added a sand splat to the upper right corner of the first page.


I flipped the layout for the second page and added some netting and a bird to the large photo. The sea grass and driftwood anchor the bottom left photo to the page.

Project Supply List:
  • Papers - Day at the Beach (CMD)
  • Sandy border, sand splat, rusted prongs, driftwood, tags and net - Oceanside Pack
  • Wave border - Summer Doodles (MMDCS)
  • Birds, grass and shells - Walking By the Sea (Sekada)

If you'd like to try My Memories, you can download a free trial here: http://mymemories.com/mms/my_memories_suite.  If you decide to buy it, be sure to use my coupon code: STMMMS97442 to get $10 off (coupon cannot be used in combination with other discounts). You will receive a discount and at no additional cost to you, I will receive a commission.


Sunday, January 13, 2019

South Slough Estuarine Research Reserve

A digital scrapbooking layout? What's going on here?

Well, I have thousands of photos on my comptuer that are just begging to be scrapbooked.  One of my goals this year is to actually FINISH a scrapbook including having it printed. Toward that end, I've decided to consolidate my scrapbooking blog with my card making blog.  Going forward you will find a fusion of both digital and physical creations. I have a passion for both card making and photography and this just made sense.

First, here's a little information about the pictures in this layout...

If you head South out of North Bend on the Cape Arago Highway, you'll eventually come across Seven Devils Road which will lead you to the South Slough National Estuarine Research Reserve.  It's right in the middle of some pretty rugged terrain, but the road leading to it is good.  You can't see much from the parking lot so you'll want to bring a good pair of walking shoes and maybe even a walking stick.  The trails are well maintained but some are a little steep.  The views make the drive and the hike well worth it.

Here are a couple pages I made in My Memories Suite using the pictures I took last January.

Picking a color palette to accent my photos is always a challenge.  I try to keep my choices to just 1 or 2 digital paper packs, but I'm not always successful.  For this two page spread I chose papers from Fireflies (MMDCS) and Day At the Beach (CMD).

For the blue and orange layers, I added photo boxes first and sized them to the dimensions I wanted. After that I added the background papers as photos and dropped them into the photo boxes.  It's always best to do any resizing before dropping the papers or photos into your photo boxes or you may end up with distorted images.


One of the things I love about digital scrapbooking is having so much control over image sizes and zoom levels.  The bridge on the above page was actually from a landscape photo. Since there was no more room on the page for a landscape shot, I dropped the photo into a portrait oriented photo box and zoomed in on just the bridge.

I don't often use a lot of embellishments on my pages, just a little here and there to accent the photos or page topic.  The embellishments for this spread came from several different kits from My Memories as follows:
  • Tags - Bella Grace Add On Kit (jjscrap)
  • Washi Tape - Beach Romance (kapi)
  • Stitches - Day at the Beach (CMD)
  • Frame, green and red leaves - Autumn Garden (CatDes)
  • Bow - Turtle Cove (MMDCS)
  • Fir sprig - A Little Birdie Told Me (DBMarci)
  • Star Confetti - Fireflies(MMDCS)
If you'd like to try My Memories, you can download a free trial here: http://mymemories.com/mms/my_memories_suite.  If you decide to buy it, be sure to use my coupon code: STMMMS97442 to get $10 off (coupon cannot be used in combination with other discounts). You will receive a discount and at no additional cost to you, I will receive a commission.


Wednesday, December 4, 2013

Chipmunk Cheeks

I created this layout using this week’s freebie from Touched By A Butterfly.

ChipmunkCheeks

This kit will only be available for free until December 15, 2013 so be sure to grab it while it’s free.

Tuesday, October 22, 2013

Vintage Photo Frame

I made the frame for this picture in just a few minutes using the Old Secret designer pack by ButterflyDsign.  The little girl in the picture is my grandma Ila.  She was an incredible lady.

12x12 Sampler-017

The Old Secret designer pack is free until November 3, 2013, so be sure to grab it while you can.  If you like vintage, be sure to check out the other designer packs from ButterflyDsign as well.

Tuesday, October 15, 2013

Pyramid Santa Made With MMS4

One of the things you can make very easily with MyMemories Suite 4 is pyramid cards.  A pyramid card is made by layering an image so that each successive layer is smaller.  Here’s one I made yesterday evening.

DSCF2541w

The Santa image I used is from an old PcCrafter set.  Here’s a video tutorial I made showing how to make pyramid cards using MyMemories Suite 4.

Saturday, October 12, 2013

MyMemories, It’ Not Just For Scrapbooking!

Wow, do I have a deal for you!  The folks at MyMemories are letting me give away FREE copies of MyMemories Suite 4 for one week.  No strings attached!  Just copy this code: FreeTreatAL87 and paste it into the Promo Code field when you check out.  It’s that easy!  This offer is only good from October 12 – 18, 2013 so be sure to get yours before it’s too late.

But you say you’re not in to scrapbooking?  That’s OK. You can do a lot more than just scrapbooking with MyMemories Suite 4.  Here’s a card I made recently using the Soft Nostalgia digital paper pack, Bodacious Bloossoms cutting file and Fairy Wishes digital stamps from PaperWishes.  The rick-rack on the inside is one of many included embellishments in MyMemories Suite.

FairyCard1w  FairyCard2w

Some of the elements are printed on the background and others were printed separately and layered on top.  I really love that I can size everything to fit the card.  No more struggling to find a frame to fit a stamped sentiment or vise versa.

You can see other projects I have created with MyMemories by clicking on the MyMemories category on the left side-bar.

Sunday, July 21, 2013

Forever In My Heart

I have some more freebies for you; three sets of papers, two patterns and several quick pages for dimensional paper hearts.  These will only be available until July 28, 2013 so be sure to grab them right away.

STM_1_4
Honeychurch
STM_2_4
Made in the USA
STM_3_4
Summer Sorbet

Here’s a card I made with one of the quick pages and the free digital papers that are included in the HoneyChurch set.

hearts20130721

The quick page I chose makes a heart that gets thicker toward the center.  The patterns and quick pages, when printed full size (8.5” x 11”), make a fairly large heart.  Since I wanted something I could put on a card, I reduced my chosen quick page 1/4 size.  I designed the front of the card in MyMemories Suite 4.  It was very quick and easy to do.  First I added a 4.75” x 6.5” rectangle and filled it with the Aqua paper included in the kit, then I added the shapes I wanted and filled them with paper.  When I was done, printed it, cut it out and added it to the front of a card blank. 

The instructions for the heart, posted on the MyMemories site say to print two copies, but if you want the paper to show on both sides, you will need to print four copies.  After cutting the strips out, arrange them in pairs, back to back so the color will show on both sides. 

After making the heart, I glued it to the front of the card, then I added a layered heart dazzle to the center and border dazzles along the edges.

As always, you do not need MyMemories Suite 4 to use the papers and templates, but it does make it easier.

If you’d like to purchase MyMemories Suite 4, be sure to use coupon code STMMMS97442 to receive $10 off the purchase price plus a $10 gift certificate to use in the My Memories online store.

Friday, June 7, 2013

Pretty Painted Piggies

Here’s a layout I created in MyMemories Suite 4 using pictures of my sweet little granddaughter and the new Serendipity digital paper pack from Hot Off The Press. 

12x12 Sampler-015

Isn’t she adorable?

I used the basic circle and scalloped circle shapes for the flowers and I used the photo shape tool to make round photos for the flower centers.   The font for the title is called Robot Teacher and the font for the journaling is CK Carefree from Creating Keepsakes.  Everything else except for the ribbons is from the Serendipity digital paper pack.

Monday, May 27, 2013

Attaching Text to a Shape in MyMemories Suite 4

The May challenge over at the MyMemories forum was to use the Attach to Shape feature on a layout.  I was almost too late to join in the fun, but I managed to find some time yesterday afternoon and put this page together:

12x12 Sampler-014

I attached the journaling to a tree shape from the Treedle Dee svg collection from Lettering Delights.  The combo pack I used for the papers and embellishments is Outdoor Adventure by Albums2Remember.

After I posted the layout, someone asked a question about attaching text to shapes, so I wrote up this quick tutorial.  Of course, I wrote it in MyMemories Suite 4!

Portrait 8.5 x 11-007

Portrait 8.5 x 11-008

If you’d like to purchase MyMemories Suite 4, be sure to use coupon code STMMMS97442 to receive $10 off the purchase price plus a $10 gift certificate to use in the My Memories online store.

Saturday, May 25, 2013

Memorial Day Wreath

Today, my ESL kids made these wreaths for Memorial Day. I got the idea for the wreath from Enchanted Learning and I found the poem at Apples4TheTeacher.com.  I used the Attach to Shape feature in MyMemories Suite 4 to make the poem star shaped.  It’s really easy to do, you just add a text box with your text, add a shape, select them both, right click and select Attach to Shape from the context menu. 

The wreath is very simple to make, especially if you have an electronic cutter.  I used my eCraft.  The shapes are basic shapes that most machines come with.

MemorialDayWreath

Obviously, you could make this just about any size, but I started with a 7” circle with a 5.5” cut-out for the base.  I sized the stars to 2.5”, 2” and 1.5” and cut them from red, blue and white card stock.  I randomly glued the stars around the circle and then when I was done, I added the poem to the front and a hanger to the back.

Wednesday, May 22, 2013

Gift Card Envelopes

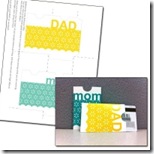
I have a new MyMemories freebie for you today.  Create one of these gift card envelopes for each of the graduates on your list.  They are quick and simple to make and completely customizable.  I used papers from the free Outdoor Fun paper pack for the gift card holder on the left and embellishments from the Bumble Flowers quick page for the one on the right.

GiftCardHolder1

You can download the templates for free until June 3.  Each set includes a blank template, two patterned backgrounds and a finished project.  Click an image below to download the corresponding template.

STM_1_3  STM_2_3_1  STM_3_3

You do not need MyMemories Suite 4 to use the papers and templates, but it does make it easier.

If you’d like to purchase MyMemories Suite 4, be sure to use coupon code STMMMS97442 to receive $10 off the purchase price plus a $10 gift certificate to use in the My Memories online store.

Tuesday, May 7, 2013

Deco Dragon Egg Freebie

I just love this week’s freebies and I think you will too. They are called Deco Dragon Eggs.  They are fun to design and easy to put together.  I cheated on the first two by converting one of the templates to a .svg file so I could cut the shapes with my eCraft.  I cut the first one from purple and lavendar card stock and then made a smaller one from patterned card stock. It takes 12 pieces to make each ball and there is no gluing or taping involved.

DSCF1911e

After I discovered how easy they were to put together, I decided to design one with photos of my granddaughters.  This time I had to do the cutting by hand, but it was pretty easy.

DSCF1906e

I printed the pieces on HP Everyday Photo paper.  I was afraid it would be too flimsy, but It holds its shape very well.  I think these would make really cute Mother’s day gifts.  You can also use them as boxes as they are about 4.5 inches in diameter if you print them full size on 8.5” x 11” paper.

If you would like to make some of your own dragon eggs, you can get the templates as well as several digital papers for free at the links below.  They will only be free for a limited time, so be sure to grab them before May 20, 2013. 

You do not need MyMemories Suite 4 to use the papers and templates, but it does make it easier.

If you’d like to purchase MyMemories Suite 4, be sure to use coupon code STMMMS97442 to receive $10 off the purchase price plus a $10 gift certificate to use in the My Memories online store.

Sunday, May 5, 2013

Another Page Done!

I was late joining in on the fun, but I did manage to win a $10 gift certificate for any of the packages by Jusme Digital, so of course, I had to spend it today while things were on sale.  I made this page with the Whenever You Remember kit.

12x12 Sampler-007

The page layout is from another Speed Scrap challenge on the My Memories forum.

Cute as a Button

As a beginning digital scrapper, I find things like the speed scrap challenges very helpful.  I’m far from speedy, but having a recipe for a page is very useful.  Since yesterday was National Scrapbooking day, there were plenty of challenges to choose from.  I chose this one from the MyMemories forum, and here’s what I came up with.

12x12 Sampler-006

The papers and embellishments all came stock with MyMemories Suite. The font for the page title is Accent Dot Writer.

Sunday, April 14, 2013

Pinwheel Bouquet

I have some more freebies for you today from My Memories, three cute sets of pinwheels.  Just download and print them as-is or use the template to design your own.  You do not have to have My Memories Suite to use the templates, but it does make it easier.  These freebies will only be available until April 21st, 2013, so be sure to grab yours today.

Here’s an encouragement card I made with three of the pinwheels.  Instead of printing them full size, I resized mine to 2.5 inches.  I found some background paper in my stash that matches the colors perfectly.

pinwheels20130414

This project needs to be printed on both sides of the paper, so play with the placement and sizing on some scrap paper with your printer in draft mode first.

Here are links to the downloads:

If you would like to purchase your own copy of My Memories Suite 4, be sure to use coupon code STMMMS97442 to receive $10 off the software plus a $10 gift certificate to spend in the My Memories store.

Friday, April 12, 2013

Making Photo and Page Masks For My Memories

Today, I learned how to make masks to use in My Memories Suite.  It all started with a post on the Facebook group.  One of the members posted a page that had been created in another program using a page mask and wanted to know if she could do the same thing in My Memories and apply paper from a specific kit to the mask. I had been playing with creating .svg files to use in MM so, I thought I’d see if I could make a mask as well.

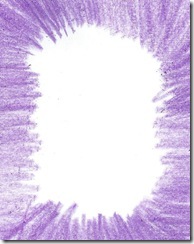
So, I broke out the crayons and scribbled a quick frame on a piece of white paper.
purpleframe1w

Then I scanned it and imported it into Make the Cut using the pixel trace tool.  I had to fiddle with the settings quite a bit, but I finally settled on using the luminescence setting with a threshold of about 225.  I then exported the mask as a .svg file and saved it into: C:\Program Files\My Memories Suite\Components\Shapes\Users.

I opened a new page in My Memories 4, added a photo, then used the shape tool to add the .svg mask over the top of the photo.  I filled the shape with blue paper and here’s the result:
Experiments-011

Papers for this page and the next page are from My Kid bundle.

Next, I got to thinking about layering multiple masks, so I ran the frame through make the cut again, this time setting the threshold to about 190 (I can’t remember the exact number) and the resulting frame had a lot more transparency.  I layered that over the first frame, filled it in with a darker paper and ended up with this:

Experiments-011b

If you’re going to try a frame this complex, be aware that it takes a LOT of memory and your system will bog down.  So far, the only way I’ve been able to free up the memory again is to exit My Memories and start it back up.

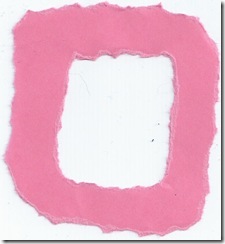
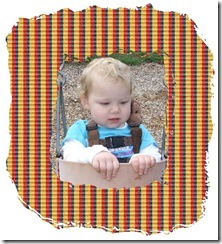
Next, I thought I would try torn paper, so I tore The middle out of a piece of scrap paper and ran it through MTC’s pixel trace utility. Here’s how it turned out:

pinkframeExperiments-013

And another:

pinkframe1Experiments-012

And finally, I decided to make a complete page mask.  One thing that’s really nice about using .svg files in My Memories is that you can shrink or stretch them to fit any page or picture and as long as you do the resizing before you add the digital paper, there’s no stretching or skewing of the paper.  Here’s a rectangular page I made from my square page mask.

Experiments-014

The papers and embellishments on this page are from the Spring Fling designer pack.

I did not have the memory problems with this page that I had with the layered masks, which confirms my theory that the more nodes and vectors (jagged edges and holes) you have in a frame, the more memory it’s going to take up when you use it.

If you don’t want to shell out the money for Make the Cut, I found a free online svg conversion tool here:  http://image.online-convert.com/convert-to-svg.  It’s not as flexible as Make the Cut, but hey, it’s free and it worked very well on the images I tested.

If you’re interested in purchasing a copy of My Memories Suite 4, be sure to use coupon code STMMMS97442 to receive $10 off the purchase price plus a $10 gift certificate to use in the My Memories online store.

Tuesday, March 26, 2013

Mini Gift Bags for Easter

I have freebies for you today!  Three downloadable kits with an Easter party bag template, some digital papers and lots of embellishments, too.  You don’t have to have MyMemories Suite 4 to use them, but it will make it easier.

Here are three bags I made with the kits.  I didn’t make any changes to the bag on the right. I printed it straight from the download.  I started with a blank template for the bag on the left and used only elements from the three digital kits.

easterbags20130325

I made the bag in the center using the Hoppy Easter set that came with MyMemories Suite 4 .  I printed the eggs separate from the bag and then used foam squares to mount them on the front.

Grab these downloads while you can.  They will only be available for free until April 7, 2013.  Here are the links (there are 3):
Freebie 1
Freebie 2
Freebie 3

If you need help constructing them, here is a link to the instructions: http://www.mymemories.com/craftables/partybag

There’s still time to enter to win a FREE copy of MyMemories Suite 4, check out the Scrapbooking kits at MyMemories.com, then come back here and add a comment with a link to your favorite pack and include a sentence or two stating why you like that pack. Only one entry per person, please. Comments must be posted by Midnight PDT, March 31, 2013 to be eligible. I will announce the winner by the end of the day on April 1. The winner must be willing to provide me with their e-mail address so I can send them the code for the free download (do not include your e-mail address in your comment!).

Sunday, March 24, 2013

Easter Chick

MyMemories 4 isn’t just for scrapbooking.  You can make other things with it too.  See the end of this post to find out how to enter to win a free copy of MyMemories Suite 4.

This week, I decided to make an Easter card using the Easter pack that came with the MyMemories software.  Since there isn’t an egg in the provided shapes, I loaded a circle into the shape editor and made my own egg shape.  It was really pretty easy to do.

easter20130322

I created the apertures for the iris folding by layering two egg shapes for each egg, one slightly smaller than the other.  I colored the larger bottom layers pink and purple and left the top layers white.  After printing the card, I cut out the white egg apertures and added the iris folding.  The papers for the iris folding are also from the Easter paper pack.  After completing the iris folding, I added pink and purple glitter paper behind the openings.

I printed two copies of the chick and layered them using foam tape.  The bottom layer of the chick is the complete image and the top layer is just the top and bottom shell and the bow.

If you would like a chance to win a FREE copy of MyMemories Suite 4, check out the Scrapbooking kits at MyMemories.com, then come back here and add a comment with a link to your favorite pack and include a sentence or two stating why you like that pack. Only one entry per person, please. Comments must be posted by Midnight PDT, March 31, 2013 to be eligible. I will announce the winner by the end of the day on April 1. The winner must be willing to provide me with their e-mail address so I can send them the code for the free download (do not include your e-mail address in your comment!).

Thursday, March 21, 2013

Come Run With Me Beside The Sea…

Here’s another page I made with MM4.  This one is for this week’s challenge on the MyMemories blog.  The challenge is to use papers and embellishments from the Hello February Add-on which is a free download.

March2013Challenge-001

Cute couple, don’t you think?

Monday, March 18, 2013

MyMemories Suite 4: Ripped Photos Feature

One of the new features in MyMemories Suite 4 is the ability to simulate a torn edge on photos and digital papers.  It’s super easy to do and I love the look!    There’s a great Tutorial on the MyMemories blog describing how to tear photos and pages.  After watching it, I was able to put together page 2 of my beach trip album in no time at all.

GirlsDayOut-002

If you would like a chance to win a FREE copy of MyMemories Suite 4, check out the Scrapbooking kits at MyMemories.com, then come back here and add a comment with a link to your favorite pack and include a sentence or two stating why you like that pack. Only one entry per person, please. Comments must be posted by Midnight PDT, March 31, 2013 to be eligible. I will announce the winner by the end of the day on April 1. The winner must be willing to provide me with their e-mail address so I can send them the code for the free download (do NOT include your e-mail address in your comment!).