Sunday, March 30, 2008

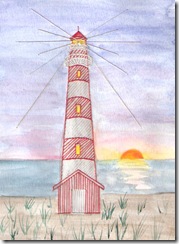
Lighthouse at Sunset

I bought a watercolor paint kit about a year and a half ago thinking that I would like to learn how to paint.  During one of my rare craft-room cleaning frenzies, the kit ended up being stashed away in a big rubbermaid storage tub with the intent that I would retrieve it at some future date when I had time to play.  Well, this weekend was the time.  I rediscovered a lighthouse stitching pattern that I created several years ago, and decided that I wanted to stitch it again, but this time with a sunset in the background.

  lighthouse20080330

The painting was a bit of a challenge.  I think the last time I painted anything was in middle school a few decades ago.  The watercolor kit had some pretty good instructions, though, and considering how long it's been, I think I did a halfway decent job of it.

If you'd like a copy of the lighthouse pattern, you can find it at http://www.handcraftedgreetings.com/embrinst.html.
Saturday, March 29, 2008

For a Sweet Two Year Old

My granddaughter turned two today!  She is such a delight.  Of course mommy and daddy think she's a little stinker most of the time, but grandma thinks she's all sugar, spice and everything nice!

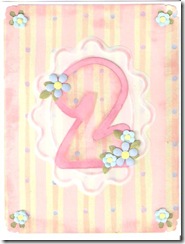
Here is the card I made for the occasion:

bdaytwo20080329

Materials and equipment used:

  • Paper Shapers funky flower punch
  • Paper Shapers circle punch
  • ProvoCraft mini flower punch
  • Fiskars Lace corner punch
  • Coluzzle Shadow Shapes number 2 template
  • Keepsake Card Crafts Majestic Embossing Board
  • Vellum
  • Striped scrapbook paper (from ProvoCraft)
  • Pink stamp pad
  • Scraps of blue, green and yellow card stock

Monday, March 24, 2008

Fun with Cuttlebug Embossing Folders

The other day one of my friends told me about very cool technique she learned on Split Coast Stampers that is done with Cuttlebug embossing folders.  You ink the folder before embossing for a really nice effect.  You can find the complete instructions here: http://www.splitcoaststampers.com/forums/showthread.php?t=333398

This birthday card for my oldest son is my first attempt:

001

I used handmade paper, which gave it a nice texture. 

Sunday, March 23, 2008

New Embroidered Card For a Baby Girl

Judging from my technique poll, a lot of people want to see some new embroidery patterns.  You're in luck!  I was commissioned to make a card for a new baby girl this week.  I was given free reign on the medium and design, so I decided to go with embroidery.   Here is the result:

PEbabybuggy20080222

It took a considerable amount of time to stitch.  I tried some traditional embroidery stitches that I haven't done on a card before,  like the lazy daisy and french knot.  They lazy daisy is a little tricky, since you can't put a needle in one hole and out another simultaneously on a card like you can on cloth.  It took a little more time and was a bit more challenging than doing the same stitch on cloth, but I really like the results.  I'll probably be using this stitch again in future patterns.

If you'd like to give this pattern a try, you can find the it on the embroidery page on my main website: www.handcraftedgreetings.com.

Tuesday, March 18, 2008

Just (barely) in time for Easter!

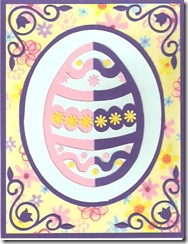
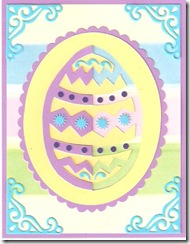
I have had the patterns finished for these cards for a couple weeks, but did not have time to make them until tonight.  They look a lot harder to make than they actually are.  The two most important tools for the job are a good, sharp craft knife paired with a good cutting mat.

cfeasteregg20080318a cfeasteregg20080318b

These cards were a lot of fun to put together.  I used paper from the Provocraft David Walker Studios Super Slab.  Having coordinating papers really helped me put them together quickly.  The card to the left has a pink background behind the cut-out, but since I wanted to take advantage of the striped effect from the paper on the card on the left, I decided to leave the cut work open open so that the background shows through.

I finished off the cards with corner die cuts I made with my Cuttlebug Victorian die set.  The eggs are decorated with punch outs from some miniature punches I bought at Michael's and with scraps from the corner die cuts.

You can find general instructions for cut and fold on my website at www.handcraftedgreetings.com/cfeaster.html or www.handcraftedgreetings.com/cfbirthday.html.

The materials and equipment I used to make these cards are as follows:

  • Double-sided paper or lightweight card stock (I used blue/dark purple for the first card and yellow/purple for the second card)
  • Solid color to put behind cutout if desired.
  • Patterned scrapbooking paper
  • Sharp craft knife (X-Acto works very well)
  • Cutting Pad
  • Tiny punches (I found most of mine in the dollar bin at Michael's)
  • Cuttlebug Victorian Die set
  • Sizzix (or Cuttlebug, or any other die cutter)
  • Decorative Scissors (for scalloped border around second egg)
  • Coluzzle small nested oval
  • Coluzzle knife
  • Coluzzle cutting mat