Showing posts with label String Art. Show all posts

Saturday, November 17, 2012

Christmas Ornament Card With String Art

A couple weeks ago, I went into a card making frenzy, mainly because my cousin talked me into attempting to sell my cards at a bazaar.  That turned out to be a total bust.  It was the first year for the bazaar and we had a grand total of about 50 people who showed up.  On the bright side, I’m that much closer to having all my Christmas cards done!  Here is one design I came up with that goes together fairly quickly.

201211redgreenornamentw

Not wanting to make a whole bunch of identical cards, I came of with several variations so I wouldn’t get bored.  Here’s another one.

201211laceornamentw

I didn’t have a suitable banner die, so I improvised.  I made the banner using the same Nestabilities Labels 2 die that I used for the ornament background.  After making the first cut, I repositioned the die and ran it through again.  The shading is done with Tea Dye distress ink.

I made the ornament with a Cuttlebug  ornament die and cut the centers out using different shaped Nestabilities dies (oval and scalloped oval shown here).  The Cuttlebug die has been discontinued, but I think the Nestabilities Heirloom Ornament would work.

I used a Nestabilities scalloped oval die to cut the shapes for the string art, and centered them under the ornament cut-out.  If you use a round opening, you can also use the Nestabilities pinked circles for the string art.  Here’s one I made using the Blossom die for the opening and the pinked circle for the string art.

201211redpurpletanornamentw

Sunday, January 8, 2012

Spirelli Birthday Cards

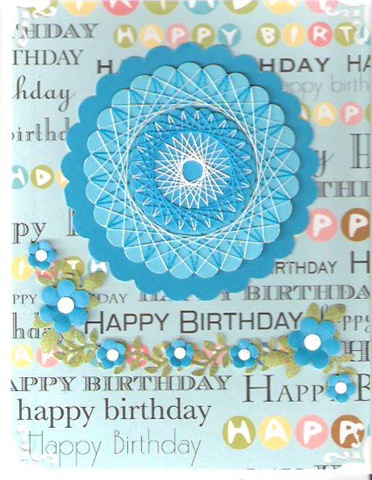
Spellbinders scalloped oval and circle die templates are perfect for Spirelli.  Here are a couple cards I made recently using the Oval templates.  I cut one large and one small oval and stacked them.

bday20120102

bday20120106

I gave this card to my mom for her birthday.  The butterfly is from the Mix ‘ems Butterflies pack from Paper Wishes.  I used a gold butterfly and shaeded the wing insets with a blue Copic marker.

Friday, March 25, 2011

Spring String!

Four cards today.  Some Spring string art cards (aka Spirelli) I made.  I printed these on cardstock using this pattern then cut them out and chalked them to give them extra color. 

sp20101107 sp20101108

 sp20101113a sp20101113b

They really aren’t as bad to cut out as you may think.  I cut the leaves out using scalloped scissors.

Wednesday, March 23, 2011

Friends

I have loads of scraps and loads of die-cuts.  So when I sat down to make this card, I grabbed a box of die cuts and told myself I had to use something from the box and that I couldn’t use anything but scraps for the background.  I had no idea how it would turn out.friends20110228

When I got done, I liked it so much that I sent it to a dear friend with whom I have been exchanging cards and ideas for several years now.  She truly is one of the flowers in my friendship garden!

Saturday, November 20, 2010

Spirelli Christmas Ornament

Last night, when I was playing with Kaleidoscope Kreator, it occurred to me that the quilter’s star template would be perfect for spirelli.  I found a photo with the colors I wanted and created a 20 point quilter’s star.  I also created a couple 10 point stars so I could turn the whole thing into a Christmas ornament. 

Here’s how it turned out:

004w

I edged the stars with gold Perfect Pearls.  The tassel is hand-made from the gold and lavender thread I used for the spirelli.

Wednesday, November 10, 2010

A Turkey Of A Card

I’ve been playing with Spirelli lately.  The other night I cut out several shapes and decided to chalk them before adding the thread.  most of them I did in pretty pastels, but I chose to do this one in fall colors instead.  After finishing it, it occurred to me that it just might work as tail feathers for a turkey.  I was hoping I had some clip art I could use for the turkey’s head and body, but I ended up making my own.  Here’s how it turned out.

turkey20101105

Everything on this card is hand cut, including the spirelli shape.  I didn’t make a pattern for the turkey, but the spirelli is from a pattern I made quite some time ago.  You can download it here: http://www.handcraftedgreetings.com/pdf/StringArt1.pdf

Saturday, October 9, 2010

Odds and Ends

I have a bunch of partially finished projects stashed here and there and my mission this weekend was to finish at least a few of them. So, I peeked in my embroidery box and found several embroidered and spirelli pieces that need to be put on cards.  All of them are at least a year old and some of them much older than that.  There are a few that are just ho-hum, but I can’t bring myself to throw them out (why? I don’t know!)

One of the spirelli pieces in particular caught my eye, so I decided to start with it.

spxmas20101008

I matted it on navy blue, then I used my die cutter and Spellbinders Pendants die to cut two pendants from textured silver foil gift wrap.  After mounting it all on a card, I decided the corners were too bare, so I put a piece of the foil gift wrap through my Xyron and cut it in thin strips and used that for the corners.  All in all, I think it turned out OK, although I could have been a little more consistent with the width of the strips of foil.

Next, was an ornament shape I embroidered who knows when with some interesting color challenges.  I wasn’t sure what to do with it until I saw the October Sketch Challenge on JustCards. That gave me just the right amount of inspiration and I pulled out my Christmas stack from DCWV looking for the appropriate papers.  The yellow stitching still looks a bit out of place, nevertheless this, I think is one of my all time favorites.

embr20101009

After that, the next one was easy.  Same idea, but all in blue.  I think I’ll call it “Blue Christmas.”

pexmas20101009

Wish I’d noticed how off-center that middle stripe was before I made it permanent, but hey, it’s handmade, it’s not supposed to be perfect, right?

You can find the embroidery patterns for the last two cards on my website at http://www.handcraftedgreetings.com/embrinst.php.

That’s it for tonight.  I have several more to make, but I probably won’t be able to do much tomorrow because my son’s family is coming over.  If I do any crafting at all I will be helping my four-year-old granddaughter run scraps through my Cuttlebug.  She loves doing that and we usually end up with a pile of pink teddy bears.

Sunday, September 19, 2010

Variations on a Theme

Here is another card I created based on the September sketch from CraftMad.  This time I used the Nestabilities Scalloped Square and Blossom Two dies. 

I wanted to make a Christmas card from non-traditional colors, so I chose some card stock that is purple on one side and pink on the other.  I am pretty sure it is from Making Memories, but I have had it forever, so I don’t know if you can still get it or not.

christmas20090918

After embossing the die cuts, I wrapped them with silver embroidery floss.  The center of the blossom looked rather empty, so I added a snowflake and a pink rhinestone. 

Sunday, April 6, 2008

String Art

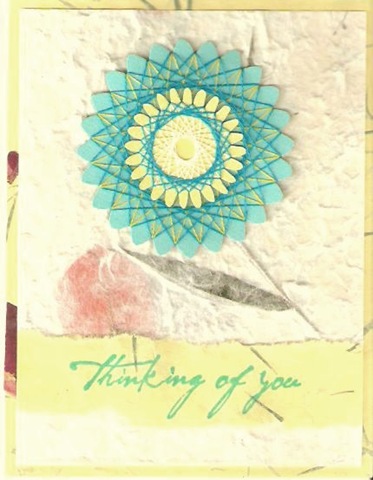
String art, also known as Spirelli, is really easy to do.  All you need are some scalloped shapes and embroidery floss.  Wrap the embroidery floss around the shapes you have a beautiful design that looks like it took hours instead of minutes to make.

Here is a card I made recently for my Sister-in-law:

010

It was made using three different punches, the Marvy Uchida Giga, Mega and Jumbo scalloped circles. I wrapped two layers of floss around the two inner circles.

I created my own shapes in Paint Shop Pro Pro to make this card:

spirelli 20080325

Don't be intimidated by the cutting.  It only took about five minutes each to cut the shapes out.  If you want to try it, you can download a page of shapes here: http://www.handcraftedgreetings.com/pdf/StringArt1.pdf

You can also purchase Spirelli punches online from various craft retailers. This is not something I've done, so I do not have any recommendations.