Showing posts with label 3-D Decoupage. Show all posts

Thursday, March 17, 2016

I Hope I’m not Bugging You!

I’m always looking for ways to use my photos on cards, so when we had a swap at Just Cards with a bug theme, I jumped at the opportunity.

I turned the dragonfly picture into 3D paper tole and it turned out really nice.  Just about everything on this card besides the photo is from Paper Wishes:

  • Viney Swirl cutting die
  • Flower Frenzy Cutting die
  • Layered Labels Template
  • Dazzles
  • Emerald Glimmer Paper
  • Papers from Personal Shopper Kits

Saturday, March 28, 2015

3-D Merganser

We took a trip up to Discovery Bay, Washington in January.  The weather was gorgeous and there were flocks of all kinds of ducks including a small group of Mergansers.  They were rather shy so it was a challenge to get a clear photo.  Here’s one of them that I converted to 3-D Paper Tole.

web_20150221_333_DSCN2805

The paper tole sheet for this card is available for download and includes instructions for the picture frame.  Just click the link below.

Supplies

  • Double-stick foam squares
  • Rich & Spicy Autumn 3D Paper Tole (HOTP)
  • Rich & Spicy Scrapbooking Papers (HOTP)
  • Precision tip scissors (Cutter Bee)

Merganser Paper Tole Download

Tuesday, October 15, 2013

Pyramid Santa Made With MMS4

One of the things you can make very easily with MyMemories Suite 4 is pyramid cards.  A pyramid card is made by layering an image so that each successive layer is smaller.  Here’s one I made yesterday evening.

DSCF2541w

The Santa image I used is from an old PcCrafter set.  Here’s a video tutorial I made showing how to make pyramid cards using MyMemories Suite 4.

Sunday, March 24, 2013

Easter Chick

MyMemories 4 isn’t just for scrapbooking.  You can make other things with it too.  See the end of this post to find out how to enter to win a free copy of MyMemories Suite 4.

This week, I decided to make an Easter card using the Easter pack that came with the MyMemories software.  Since there isn’t an egg in the provided shapes, I loaded a circle into the shape editor and made my own egg shape.  It was really pretty easy to do.

easter20130322

I created the apertures for the iris folding by layering two egg shapes for each egg, one slightly smaller than the other.  I colored the larger bottom layers pink and purple and left the top layers white.  After printing the card, I cut out the white egg apertures and added the iris folding.  The papers for the iris folding are also from the Easter paper pack.  After completing the iris folding, I added pink and purple glitter paper behind the openings.

I printed two copies of the chick and layered them using foam tape.  The bottom layer of the chick is the complete image and the top layer is just the top and bottom shell and the bow.

If you would like a chance to win a FREE copy of MyMemories Suite 4, check out the Scrapbooking kits at MyMemories.com, then come back here and add a comment with a link to your favorite pack and include a sentence or two stating why you like that pack. Only one entry per person, please. Comments must be posted by Midnight PDT, March 31, 2013 to be eligible. I will announce the winner by the end of the day on April 1. The winner must be willing to provide me with their e-mail address so I can send them the code for the free download (do not include your e-mail address in your comment!).

Friday, January 4, 2013

Scrapping Keukenhof

I have two crafty resolutions this year.  One is to do more scrapbooking (I have boxes and boxes of photos) and the other is to use more of the supplies I get in my monthly shopper and VIP kits from Paper Wishes. 

To get things started, I pulled out some pictures I took while visiting Keukenhof several years ago.  I thought they would go well with the Pyramid Papers I got in my VIP package. 

DSCF1695wDSCF1692w

I used the Boutique paper pack for both layouts. On the first layout, I wanted to mimic the lacy border from the pyramid decoupage, so I used the long lace border stamp from the Lace and Doilies stamp set and stamped it on brown paper using white ink.  I used Multi Shaper punch for the picture borders on the second page.  The top and bottom page borders are the trimmings from the picture borders.

Wednesday, July 27, 2011

Reverse Iris Fold and 3D Ram

I just love Dwight Kirkland’s Father’s Day collection at PcCrafter.com.  The images are perfect for making cards for men (something I struggle with!).  I made this birthday card for my Nephew using both reverse iris folding and 3D decoupage.

JoelBday070911w

The thing I really like about this particular collection is most of the animals overlap the frame, which works very well for 3D decoupage.  Doing the background in reverse iris fold also gives the card more depth.

Thursday, March 31, 2011

Cardinal

Coming up with ideas for cards for men is always difficult to for me.  As I was sorting through my scrap pile the other night, I found some good papers for a “man” card but I couldn’t figure out what to do with them until I remembered some Father’s' day clip art I had.  I used this cardinal from PcCrafter’s Father’s Day collection.  The technique is reverse iris folding with 3D decoupage.  I really like the way it turned out.

cardinal20110329

I had always wanted to do this picture in 3-D decoupage, but the thought of all of the detailed cutting kept me from it.  The reverse iris folding gives the card depth without all of the intricate cutting.  After finishing the iris folding, all that was left to cut out was the bird and the branch.  I just love how he pops out of the frame!

Saturday, September 5, 2009

A New Cardmaking Friend!

Over the past few Thursday evenings I have been teaching my friend's daughter how to make cards.  It has been really fun and she is quite talented.  I showed her iris folding and I think she's hooked.  She made her first card using my fan pattern (sorry, I didn't get a picture).  Her second card was a seashell.  Here it is:

HeidiShell20090903 

As you can see, she has quite an eye for design.  I'm looking forward to seeing what she makes next Thursday!

The card I made is for a man at church who is in the hospital with cancer.  The design was inspired by the memory of one Sunday afternoon when he was out in the field next to our parking lot with a fishing pole teaching one of our other members how to cast. 

ifFish20090903

You can't tell from the photo, but the fish and the lure are 3-d.  The images are from PcCrafter's Father's Day collection by Dwight Kirkland.

Saturday, August 15, 2009

Peace on Earth

Ah, finally, the creative juices are beginning to flow again.  It's good to be back!  The design for this card just popped into my head and I had to get it out before it vanished.  I used some clip-art from PcCrafter as a pattern for the dove.  I traced the body and the wing separately onto white paper, cut them out and then used distress ink to shade them.  I rounded the edges with a large-ball embossing tool to give them some dimension and then mounted them on the background using foam squares.

 200908153DDove

I did the writing on the ornament with a metallic silver pen I bought several years ago from Creative Memories.  At the time, I thought the set of four pens was awfully expensive, but they were well worth every penny.  They write so smoothly, they dry fast and they never clog.

The writing isn't quite freehand.  I used Printmaster to format it in a circular shape, then I printed it out and used my light box to trace the basic lettering onto the ornament in pencil before finishing it with the metallic pen.

Monday, January 19, 2009

Some Bunny Loves You!

I had the day off today, so of course, I spent some time making cards.  Here is a Valentine's card I made that combines iris folding and 3-D decoupage.

 Some Bunny Loves You - Valentine's card with Iris fold heart and 3-d decoupage bunny

For the iris folding, I drew a heart with one of my graphics programs and used it as a pattern for the cut-out.  I used the largest triangle from my iris folding triangle template which can be found here:
http://www.handcraftedgreetings.com/pdf/triangleIris.pdf

The iris folding paper is gift wrap I purchased some time ago at the dollar store.

For the crowning touch, I used this little bunny from Colleen Parry's Petals and Patches collection at PCCrafter.  Isn't she adorable?  The decoupage was done in five layers and didn't take very long at all.  When using more than three layers for decoupage, I use card stock between the layers instead of double-stick foam squares, otherwise it makes the card too thick to mail.

3-D decoupage bunny

List of materials:

  • A2 Red glittered card blank from DCWV
  • White card stock (print the bunny on this)
  • Pink card stock (print Some Bunny Loves You on this)
  • Fiolex Girls font
  • X-Acto knife
  • Drawing software (or draw heart free-hand)
  • Three different colors of giftwrap cut in 1" wide strips (about 18" of each color)
  • Heart jewel
  • PSX Mini heart brads
  • 5 copies of Bunny from the Petals and Patches collection at PCCrafter printed about 3 inches high.
  • Precision tip scissors
  • Glue

You can find detailed instructions for iris folding here:
http://www.handcraftedgreetings.com/irisinst.html

Friday, January 2, 2009

Stained Glass Window Card

I finished the stained glass window on this card several years ago, but I never could figure out what to do with it.  Yesterday, someone sent me an e-mail asking if I had a pattern for a stained glass window, so I decided to dig this card out of the unfinished box and finish it.

010

The clilp art is from PCCrafter.  The bride and groom are from the November 2005 PC Hug Club "Topper" set.  The bird is from the Friends Forever collection by Tricia Santry.  I did the bride and groom in 3-D using three layers.  I started to use pop-dots between the layers, but they were too thick, so I glued three layers of lightweight card stock together and used that instead. It was a little more work, but the spacing is much better and I don't have to worry about the card being too bulky to go in the mail.

You can download the pattern for the window at: http://www.handcraftedgreetings.com/irisfoldinst.html

If you've never done 3-D decoupage before, there's a brief description on my website at www.handcraftedgreetings.com/cfbirthday.html (see steps 10 and 11).

Sunday, November 25, 2007

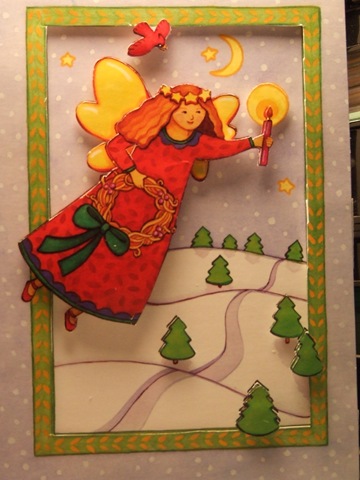
3-D Decoupage from Dollar Store Cards

One of my favorite things to do for 3-D decoupage is buy packages of cards from the dollar store.  I look for cards with well defined lines so they are easier to cut.  Here are a couple I made this afternoon.

004 

008

These were made with only three layers.  I usually like to use more layers, but I needed these to fit into an envelope for mailing.

If you've never done 3-D decoupage before, using cards is a great way to start.