Monday, April 25, 2022

With a little planning, you can maximize your specialty paper using the zero-waste die cutting technique

 What is zero-waste die cutting?

With zero-waste die cutting you use all of the pieces from your die cuts, even the negative space and the "innies." It requires a little planning ahead because you need to think about how you will use both your initial die cut as well as the leftovers.

In this short video I show you a couple tricks I have learned along the way to make this technique a little easier, especially when using intricate dies.


Here are some more examples.


I used the left-overs from this beautiful blue holographic paper

To make this card.  I like this one better!

Is it a red poinsettia, or a poinsettia on red?  Notice how I switched up the greetings.


I used some leaf skeleton dies to cut these leaves from a master board and some green and brown cardstock.  I alternated the innies from each as inlays. I love how they turned out!


After cutting the leaves out, I didn't want to toss what was left of my master board, so I backed it with yellow cardstock and used some of the die cuts to stencil in the leaves with green chalk.


I hope this has inspired you to look at your die cuts in a different light!


Saturday, April 23, 2022

Four Easy Steps to Make a Master Board

 What is a master board?

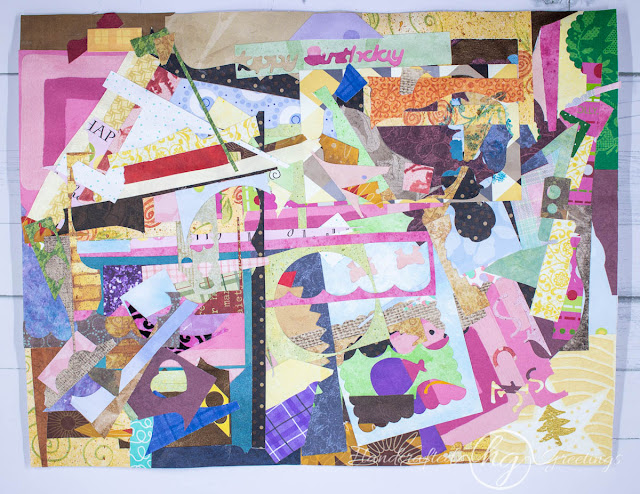
There are a lot of different ways to make a master board, but basically a master board is a mixed media collage that is made on a large background that is then cut down and used in smaller projects. Creating a master board is fun and can be as simple or as difficult as you want it to be. There are no rules.

Steps to make a master board

Here are the steps I took to make a master board from patterned paper scraps:

1. Cover a sheet of paper with patterned scraps

This is possibly the most time-consuming step. I used scraps that I would normally discard so some of them are quite small. This step took well over an hour.

First layer of master board covered in patterned scraps

I like to completely cover the paper. This results in many areas having multiple layers. Since the finished product is going to be cut apart, it is important to make sure that each layer is completely glued down. I've used Aleene's Tacky Glue* as well as Golden Matte Gel Medium.  I recommend wearing gloves for either one to avoid sticky fingers!

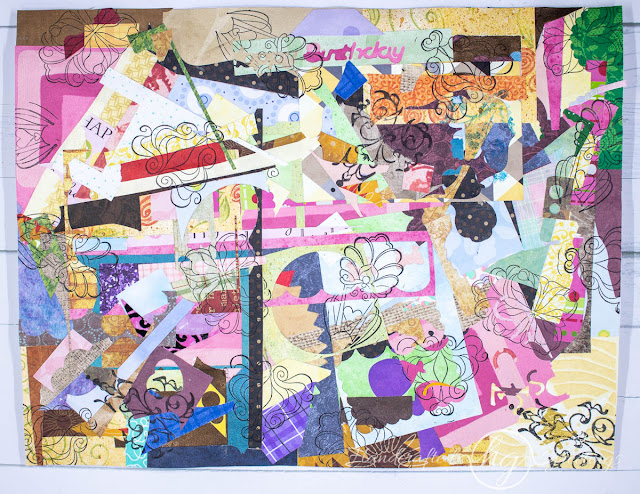
2. Stamp some interesting images or shapes

Dig through your stash for some stamps with interesting shapes or images. I have a set of flourishes and filigrees that I rarely use. I thought it would be perfect for this project. I stamped them with Memento Tuxedo Black ink*, but you could use colors as well.

Master Board with stamped images

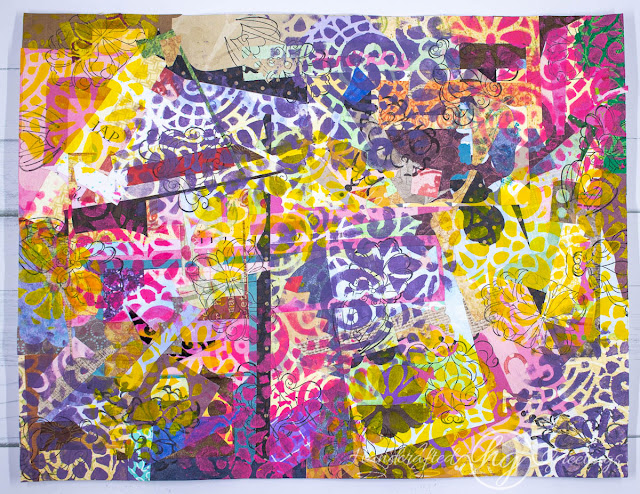
3. Stencils and Acrylics

Next comes the messy part.  Grab some sponges, stencils and acrylic paint in multiple colors (I used purple, yellow and hot pink). Stencil several areas with different colors.  

Stenciling with acrylic paint

I only used one stencil this time (by Balzer Designs), but I often use two or three. 

4. Heat Embossing

Wait until your project is completely dry to do this step.  While you are waiting for it to dry, collect the following:

I recommend only stamping a few images at a time, and then embossing them. It's easier to keep track of where you have stamped that way.

Completed master board with stamping, stenciling and embossing

Once you've finished the embossing, you are done.

That was easy, wasn't it?

What can you do with a master board?

Here are just a few ideas.

  • They make great tags


  • Die cut leaves or other shapes


  • Use it for a card front
  • Make a journal cover
  • Make a wall-hanging.


Monday, September 13, 2021

Scrap pile challenge: Using digital images

I have a confession to make. I am a clip-art junkie!  I have thousands of images but do I use them? Rarely! 

The third rule in my scrap pile challenge is to use things I already have and that includes digital images. Thanks to my inability to turn down anything free I have a lifetime supply of 4 x 6 photo paper so that's what I use to print clip art.  The colors are so much more vibrant than when I print on cardstock. 

Here are three of the cards I made using clipart I bought from PcCrafter over 10 years ago (that's how long ago they closed up shop). 


I love the bright red and deep purple in this image and I repeated them in my cardstock selection.


Both the bouquet and the panel that holds the bouquet are popped up on foam tape to give the card dimension.


How can you NOT smile with this little guy staring back at you?

So stinkin' cute!

Here's another card were I used vellum to soften the background.  This little squirrel was lost in the leaves until I added the torn vellum layer. I wrapped the vellum around the edges of the patterned paper and adhered it to the back so there's no adhesive showing through.

Next, I popped the squirrel and three leaves up on foam squares.
It's fall, Let's dance!

Now it's your turn. Dig into your collection of clip art and create something!


Monday, September 6, 2021

Scrap Pile Challenge: Of Scraps, Fairies and Vellum

 A couple weeks ago, when I was looking for something in my craft closet, I came across a box of coordinated scraps that I had set aside for who-knows-what.  Rather than toss them or add them to my growing stash of "I'll use this someday" scraps, I decided to set a little challenge for myself:

The rules:

  • The card base is the only "new" cardstock I can cut into. Everything else has to come from existing scraps.
  • Use images I've already stamped and colored.
  • If I use printed images, they have to come from what I already own (I'm a bit of an addict)
  • All the patterned paper must come from the box.
Here's what I started with:


So far, I've made 14 cards and I still have enough scraps for more.  For the first five cards I chose images from the Fairy Days digital stamp set from RG Studio 360.

Aren't they adorable?


The background was a little overpowering so I cut some pierced ovals from vellum and hand stitched them over the patterned paper.  This softened the background and highlighted the fairies.


I used up a couple of the large labels on the next two cards as well as a strip of flocked pink paper.


Butterfly dazzles add a little sparkle.

A ladybug at the bottom left balances out the red of the apple and the fairy's shirt on the upper right.

I added a lace border and dragonfly dazzles to the final card

I had a lot of fun with this challenge.  Being restricted to a small set of papers helped me focus more on the creative process since my color pallet was already decided for me.

I will be sharing the rest of the cards I made in another post.  In the meantime, Take a look at your pile of scraps. What can you make with what you already have?

Sunday, April 18, 2021

A Great Way To Showcase Your Photos On Your Cards

 Last week on the PaperWishers forum a friend posted some bay window cards. I had never seen the technique before so I had to give it a try.  I thought they looked like they might be a perfect match for my photos and I was right!

After the first one, I was hooked.  I have lots and lots of pictures of  birds so I'll be reusing this sentiment. The feathers are from a download from 88 and Clear.


Part of the fun is coming up with sentiments to go with the pictures.


This one is from our trip to Hawaii


These cards were super easy to make and are A2 size (4.25" x 5.5").  I got measurements that work perfectly for 4x6 photos from Rachel Tessmans' YouTube tutorial here: (5) Bay Window Fold Card - YouTube

In Rachel's instructions the panels are 4 1/8" tall but 4" works just as well.

Watch Rachel's tutorial for the instructions but here are the measurements.

  • Score a 4 1/4" x 11" card on the long edge at:
    • 3/8"
    • 1 7/8"
    • 3"
    • 5 1/8"
    • 5 1/2"
  • Cut your 4" x 6" photo into panels from left to right as follows:
    • Panel 1: 1 3/8" 
    • Panel 2: 1 5/8"
    • Panel 3: 1 3/8"
    • Panel 4: 1 5/8" 

Saturday, March 7, 2020

Twister Card

I was flipping through some old books this morning in search of some inspiration and I found it in the form of a twister card. Unfortunately, the cards were made from a kit so there were no measurements. After a little trial and error, I came up with a pattern. It's not too difficult, but there is quite a bit of measuring. Math and crafting... who knew?

Here are views of the front and back when it's laying flat.


And here's what it looks like standing up


Pretty neat, huh?

Want to know how I made it?  Read on!

Instructions:
  • Cut a 4 1/4" x 5 1/2" rectangle from Raspberry Berry cardstock
  • Cut a 3 3/4" x 5 1/4" rectangle from Butter Cream cardstock
  • Cut a 2 1/4" x 2 3/4" rectangle from Raspberry Berry cardstock
  • Center the second largest Journey Rectangle cutting die on the large Raspberry Berry rectangle to create the outer frame.
  • Layer the Raspberry Berry Frame on top of the 3/1/4" x 5 1/4" Buttercream panel so that the bottoms of the Raspberry Berry frame and Buttercream panel are aligned and the Buttercream panel is centered in the Raspberry Berry frame.  The top of the Buttercream panel should extend about 1/4" above and behind the top opening in the Raspberry Berry frame.
  • Center the third largest (2 1/4" x 2 1/4") Journey Square on the upper portion of the Buttercream panel as shown and run it through your die cutting machine. It is very important that the square is centered horizontally.
  • Run it through your die cutting machine.
  • Cut the frame "legs" by positioning the same Journey Square die so that the top cutting edge is about 1/4" up from the bottom of the Buttercream panel.
  • It should look like this when you are done.
Now it's time to measure!
  • Measure 2 1/8" in from the left side of the Raspberry Berry frame.
  • Use a pencil to place a dot 1/8" above the top inside edge of the frame.
  • Repeat on the bottom of the Raspberry Berry frame.
  • Measure in 1 5/8" from the left edge of the Buttercream panel.  
  • Make a dot 1/8" below the Center top, 1/8" above the center opening, 1/8" below the center opening and 1/8" above the bottom of the panel.
  • Measure 1 1/8" from the long edge of the Raspberry Berry panel and place a dot 1/8" from the top and bottom edges.
  • Now that all the centers are marked with a dot, cut 1/8" deep notches as shown.
  • Erase the dots
  • match up the notches on the Buttercream panel with the notches on the large Raspberry Berry Panel. as shown.

  • You may need to adjust the depth of the notches.  Be careful not to cut them too deep.
  • Match the notches of the small Raspberry Berry panel with the noches on the Buttercream Panel as shown
  • Congratulations!  You have assembled your twister card!
  • It should look like this when standing.
Now you are ready to decorate!